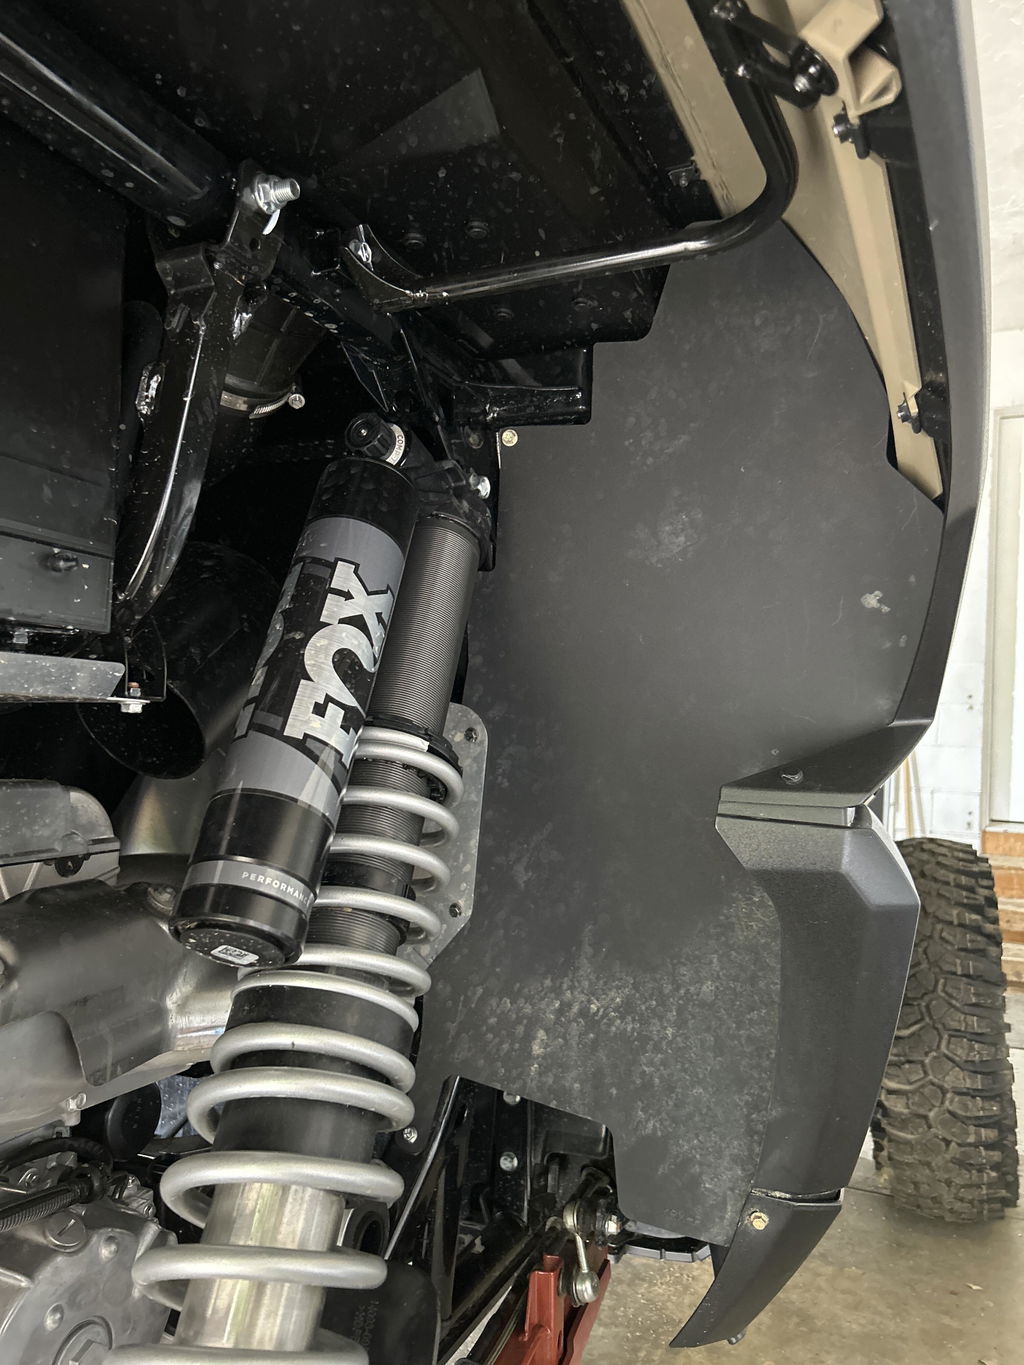


You have done the research, chosen the right protection, and your Trail Armor skid plates have arrived. Now comes the part most riders overthink: the installation.
Trail Armor skid plates are designed so most owners can complete the installation themselves. You do not need a professional installer, a full workshop, or a lift. You need basic tools, a clean workspace, a few hours, and the photo-documented instructions that come with every Trail Armor kit.
This guide walks through everything you need to know about how to install a skid plate on a UTV, from preparing your machine and laying out your hardware to the final check before your first ride with new protection underneath.
Before you touch a single bolt, take five minutes to confirm you have everything you need. A prepared install goes smoothly. An unprepared install wastes time.
Confirm fitment first. Before opening any hardware bags, verify that your Trail Armor kit matches the fitment listed for your exact make, model, and year. Trail Armor products are engineered for specific vehicle platforms, so taking a minute to confirm fitment before installation helps prevent surprises and keeps your install on track.
Basic tools you may need: Tool requirements vary by UTV and kit, so always refer to the photo-documented instructions for your specific application.
Check your kit contents. Lay out every panel and hardware bag before starting and cross-reference against the packing list. Every Trail Armor kit ships with photo-documented installation instructions. Read through the full set of instructions once before picking up any tools. Understanding the installation sequence before you begin can save time and prevent mistakes later in the process. To learn more about the brand behind every product, read Who Is Trail Armor? The Story Behind the Brand Built for Serious Riders.
Tip from riders in the field: Lay all panels out in their approximate installed positions next to the machine before starting. Visualizing the full system before installation makes the sequence much clearer.
This is the most common question riders ask before purchasing a Trail Armor skid plate. Trail Armor designs its skid plates to use existing factory mounting points wherever possible. Depending on the UTV and kit, some installations may also require self-drilling screws or other mounting procedures identified in the included instructions. A self-drilling screw creates its own mounting hole and threads as it is installed. Always follow the instructions provided for your specific kit.
For a full explanation of why fitment and installation design matter when choosing UTV skid plates, read How to Choose the Right Skid Plate for Your UTV: A Practical Guide for Every Rider.
Good preparation is the difference between a smooth installation and a frustrating one. Here is how to set up correctly before the first panel goes on.
Make sure your UTV is as clean as possible before you start.
You need adequate access to the undercarriage. Vehicle ramps can provide additional working room, or you can safely raise and support the machine using properly rated jack stands. Always make sure the vehicle is stable and securely supported before working underneath it.
Most UTVs come with some form of factory underbody protection. Remove it before installing your Trail Armor kit. Apply penetrating oil to any stubborn factory bolts and allow it to soak before attempting removal. Forcing a seized bolt can damage the bolt, threads, or mounting point and make installation more difficult.
This step is overlooked more often than any other in the installation process. Mud, grit, and trail debris pack into mounting holes on any machine that has been ridden. Dirty mounting holes cause threading problems during installation and can prevent bolts from seating correctly. Clean every hole thoroughly before starting.
Check each factory mounting point for damage or corrosion before installing. If a mounting point is damaged, address it before the new skid plates go on. A skid plate is only as secure as the points it mounts to.

These skid plate installation steps apply to Trail Armor skid plates across all supported UTV platforms. Always follow the photo-documented instructions included with your specific kit as the primary reference. These steps provide the general framework and best practices.
Lay out all panels and hardware bags. Cross-reference every item against the photo-documented instructions before starting. Identify each panel and its position on the machine: front, center, rear, and side.
Use the photo-documented instructions for your specific UTV to determine the correct order of panel placement and hardware locations. Position each panel in its proper location before beginning the dry fit.
With the panels in position, install the hardware according to your specific photo-documented instructions without fully tightening it. Leaving the hardware loose allows the panels to shift slightly so you can achieve a clean, flush fit. Once all panels and hardware are in place, check that everything is aligned correctly. At this point, you have completed the dry fit stage. If anything is not lining up properly, make the necessary adjustments before final tightening.
Factory mounting locations can vary slightly from one machine to another due to normal OEM manufacturing tolerances. When Trail Armor designs a skid plate, we align our mounting holes to the OEM mounting locations on the vehicle used during product development.
In rare cases, an OEM mounting hole on your machine may not line up perfectly with the corresponding hole in the Trail Armor skid plate. If this occurs, first confirm that the correct panel is installed in the correct position and that all surrounding hardware remains loose. If the panel is positioned correctly, you may need to slightly modify or enlarge the mounting hole in the skid plate to align with the OEM mounting location on your machine.
Do not fully tighten one panel before the others are in position. Tighten in sequence, refer to the specific photo-documented instructions. Snug each panel progressively rather than completing one fully before moving to the next. This distributes tension evenly across the system and helps prevent one panel from pulling another out of alignment.
Once all panels are tightened, confirm that the pre-drilled service access holes align with your machine's oil drain and routine maintenance points. Confirm that the integrated drain holes are clear.
Go over every bolt one final time and confirm that all hardware is properly seated and secure. Check that each panel is securely mounted, and make sure no panel edges are contacting or catching on frame components or suspension parts.
Installation time varies by vehicle and kit, but approximately 2 to 4 hours is a good estimate for a careful first-time installer working alone. Having a second person can make positioning larger panels significantly easier.
Knowing what goes wrong on a skid plate installation is just as useful as knowing the steps. These are the mistakes that turn a straightforward install into a frustrating one.
Make sure all mounting holes are clean and free of mud, dirt, and debris before installing hardware. Clean mounting points help the bolts thread correctly and reduce the chance of cross-threading.
Fully tightening one panel before the others are positioned can create tension that pulls the remaining panels out of alignment. Position everything loosely first, then tighten in the sequence shown in your specific instructions.
Position all panels and start the hardware without fully tightening it so you can confirm proper alignment and fitment. Once everything is positioned correctly, proceed with final tightening.
Trail Armor skid plates are made from 1/2-inch Super Tough Polymer, with mounting hardware recessed into the material. Excessive tightening is unnecessary and can damage the hardware, mounting point, or skid plate. Tighten hardware securely and follow any specific tightening instructions provided with your kit.
Hardware can settle as the machine goes through its first few rides and vibration cycles. Re-check all mounting hardware after the first 2 to 3 rides and confirm that everything remains securely fastened.
One of the advantages of Trail Armor skid plates is the low-maintenance nature of our Super Tough Polymer. Unlike metal skid plates, the polymer does not require rust treatment, painting, or protective surface coatings. The skid plate material itself requires very little ongoing maintenance.
What does require occasional attention is the mounting hardware and the condition of the system after riding.
Vibration, trail impacts, and normal use can cause hardware to loosen over time. Periodically check all mounting bolts and make sure each panel remains securely fastened.
Check for mud, rocks, or debris trapped between the skid plates and the undercarriage. Trail Armor's integrated drain holes help allow mud, water, and debris to clear from the system, but a quick post-ride inspection is always a good practice.
Trail hazards and the potential for damage are an inherent part of normal off-road riding. After a significant impact, visually inspect the skid plate and mounting points for any signs of damage. Trail Armor’s Super Tough Polymer is designed to flex on impact and return to its original shape, but it is still important to inspect the area after a hard hit and confirm that the panel and mounting hardware remain secure.
Trail Armor skid plate systems are designed with individual panels that can be removed when needed. If a specific area of the machine requires inspection or service access, you can remove the relevant panel rather than taking off the entire skid plate system. If a panel is ever lost or damaged, you can also replace that individual panel instead of replacing the entire skid plate kit.
For a full breakdown of skid plate material properties and why Super Tough Polymer requires no maintenance while steel and aluminum do, read Trail Armor's Super Tough Polymer vs. Aluminum vs. Steel: What Your UTV Skid Plate Is Actually Made Of.
Yes. Serviceability is an important part of the way Trail Armor designs its skid plate systems.
Trail Armor skid plate sets are designed with service access in mind, including pre-drilled access holes for oil drains and routine maintenance points where applicable. This allows many common maintenance tasks to be performed without removing the entire skid plate system.
Integrated drain holes help mud, water, and debris escape from between the skid plates and the undercarriage. After muddy or wet rides, it is still a good idea to visually inspect the underside and clear any debris that remains.
Recessed mounting hardware keeps fasteners protected from direct contact with rocks and trail obstacles while helping maintain access when a panel needs to be removed for service or inspection.
This design is intentional. Routine maintenance should not require removing an entire skid plate system every time you service your machine. Trail Armor incorporates service access into the design wherever possible, helping make regular maintenance easier while keeping your protection in place.

UTV skid plate installation does not have to be complicated. Trail Armor skid plate systems are designed with the owner-installer in mind, using vehicle-specific photo-documented instructions, clearly identified hardware, and built-in service access where applicable.
The tools are basic, the process is straightforward, and taking the time to properly dry fit and align the system helps ensure a clean installation.
Find your UTV make and model in the full Trail Armor catalog and get the right Trail Armor skid plates for your machine.
For a careful first-time installer working alone, allow approximately 2 to 4 hours. Having a second person to help with panel positioning can reduce installation time and make larger panels easier to handle. Experienced installers familiar with the system can complete the job faster.
Most Trail Armor installations can be completed with common hand tools. Tool requirements vary by vehicle and kit, so refer to the photo-documented instructions included with your specific skid plate system. Common tools include a socket set, ratchet, Torx bit socket set, impact driver and ramps or properly rated jack stands for undercarriage access. Some applications may require additional tools as specified in the instructions.
Most Trail Armor skid plate installations can be completed by one person. Having a second person can make positioning larger panels easier, but may not be necessary depending on the vehicle and kit.
Panels should sit in their intended positions with proper alignment and overlap according to the photo-documented instructions. All mounting hardware should be properly seated and secure. Where applicable, service access holes should align with the appropriate maintenance points, and drain holes should remain clear and unobstructed.
Re-check all mounting hardware after the first 2 to 3 rides and confirm that each panel remains securely fastened. After mud or water rides, inspect for debris that may have collected between the skid plates and the undercarriage.
Yes. Trail Armor skid plate systems are designed with individual panels that can be removed when needed. This allows targeted access for inspection or service without removing the entire skid plate system. If an individual panel is ever lost or damaged, that panel can also be replaced separately rather than replacing the entire kit.
{"one"=>"Select 2 or 3 items to compare", "other"=>"{{ count }} of 3 items selected"}